Create Your Own Vintage Photoshop Brushes
11
If you have ever worked with Photoshop, you’ve probably used Photoshop brushes. But do you want to learn to make some great brushes by yourself? In this tutorial I’ll teach you how to create your own brushes from photographs or pictures, how to create brush sets and share them with others.
For example, let’s make an ornamental brush from a decoration in a book.
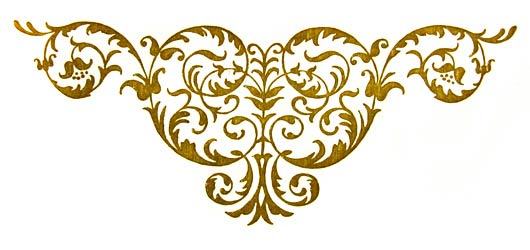
1. First, I took a picture of the page with an ornament. Here is how it looks, resized and cropped:
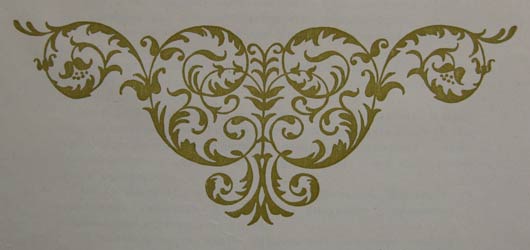
2. Now we’re gonna edit the image so that it can be a brush. We need black ornament on white background.
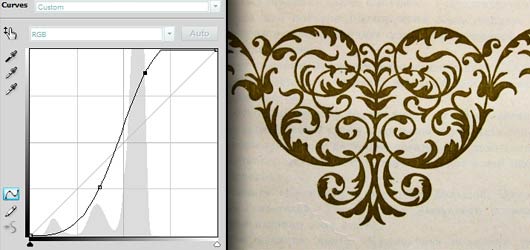
Create a new Curves adjustment layer and change the curve into an S-shape to add contrast to the image:
3. However, there are some extra shadows on the image that need to be removed. I selected Dodge Tool and set its parameters to: Size: 300 (this depends on the size of your image), Range: Midtones, Opacity: 50%. Then I painted on the areas that needed to be lightened. This adjustment won’t affect the ornament, but will lighten the background so it becomes almost white:
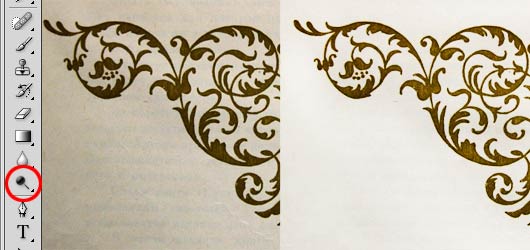
Here is the result after some experiments with Dodge Tool.
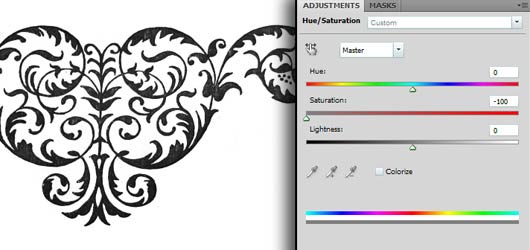
4. Now desaturate the image, because we won’t need the colors anyway. And we can see the image that will become the final result. Select a new adjustment layer with Hue and Saturation, and set the Saturation to its minimal point. I got this:
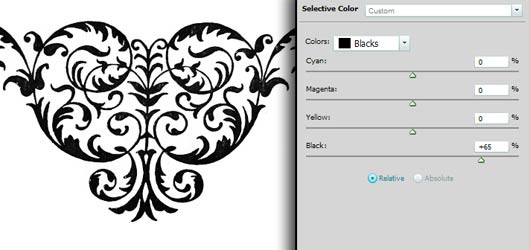
5. As the brush should not have artifacts from the photo, we will add more contrast to it and check the picture once again. Select a new adjustment layer with Selective Color, choose Blacks in the drop menu and drag the slider of Blacks to increase the value until we’re satisfied with the result:
Make last corrections with Eraser, paint with small black brush if there are unnecessary white spots on the image, or add some sharpness with Unsharp Mask filter if necessary.
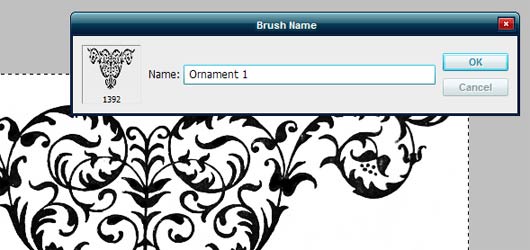
6. Let’s create a brush preset. Select the image with Select -> All, then click Edit-> Define Brush Preset and input the name of your preset, for example, “Ornament 1”:
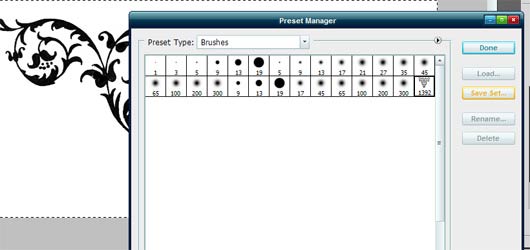
7. The brush is ready. Let’s create an ABR file that you can use later and share with others. Select Brush Tool, open the brush presets window and in the menu on the right (that can be seen by clicking the small arrow) choose Preset Manager. In Preset Manager window, choose the thumbnail of your new brush (hold Ctrl to select multiple brush presets) and click Save set. Choose the destination folder for your brushes and… you’re ready! Congrats!
Download the brush used in this tutorial for free!



[…] Create Your Own Vintage Photoshop Brushes | Flash, Design, Vector … Posted in Photoshop | Tags: from-photographs, great-brushes, hotographs-or-pictures, […]
[…] the rest here: Create Your Own Vintage Photoshop Brushes | Flash, Design, Vector … […]
This article has been shared on favSHARE.net. Go and vote it!
[…] View post: Create Your Own Vintage bPhotoshop Brushes/b | Flash, Design, Vector b…/b […]
[…] posted here: Create Your Own Vintage Photoshop Brushes | Flash, Design, Vector … Share and […]
[…] post: Create Your Own Vintage Photoshop Brushes | Flash, Design, Vector … Share and […]
WoW 🙂 Awesome tutorial to learn. Very easy and well defined . thanks for sharing this nice post.
An excellent tutorial, very clear and a fantastic outcome, thank you very much.
Awesome!!!Excellent tutorial.Thanks for sharing.
I thinks this is greatest post for design professional. I really appreciate these kind of outstanding work. Thanks for your tutor!!
Creativity design makes a image colorful and gorgeous. Thanks for share.