Digitize Scanned Paper Drawing Photoshop Tutorial
6
Converting a paper drawing to a digital artwork in Photoshop looks like an easy step but it is not. It is a tricky one that needs you to learn some tips to create an accurate digital version of your drawing, which you can use in many design tasks like converting pencil mockup to a digital version or put your ideas in computer to use it in your design. This Photoshop tutorial shows how to convert a paper drawing to a digital artwork in Photoshop using a scanned version of the paper art.
Related posts:
- Quick Tip: How to Create a Seamless Pattern in Photoshop
- How to Create Islamic Style Poster in Photoshop
- How to Customize Skyscraper Background in Photoshop
- How to Create a Photo Manipulation Poster in Photoshop
- Amazing Photo Manipulation Tutorials
- How to Create a Comic-Book Style Image of Yourself
- How to Create HDR Photos in Photoshop CS5
Items needed:
- Scanner [Epson scanner shown]
- Photoshop [any version]
- A drawing [Black and White]
Level of difficulty:
- low
Step 1
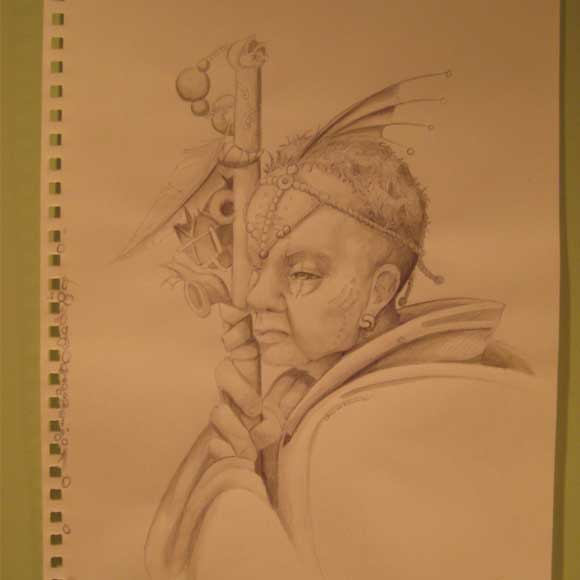
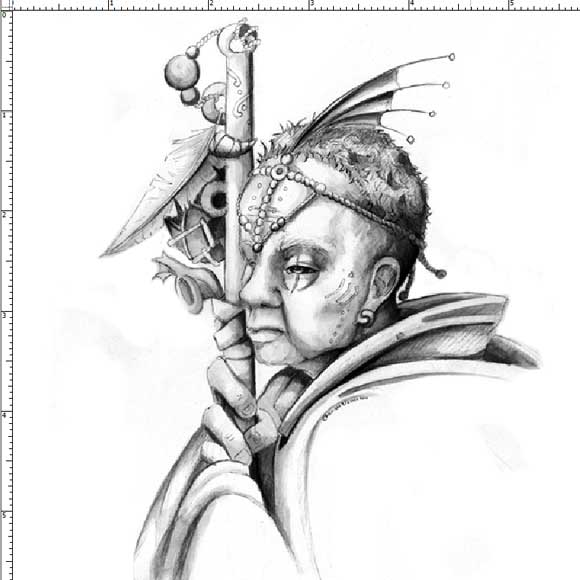
First, pick out the drawing you want to use. For this one it will be a black and white drawing. If you want to do a colored drawing you’ll have to use a few different steps, so for this tutorial pick out a black and white one.
Step 2
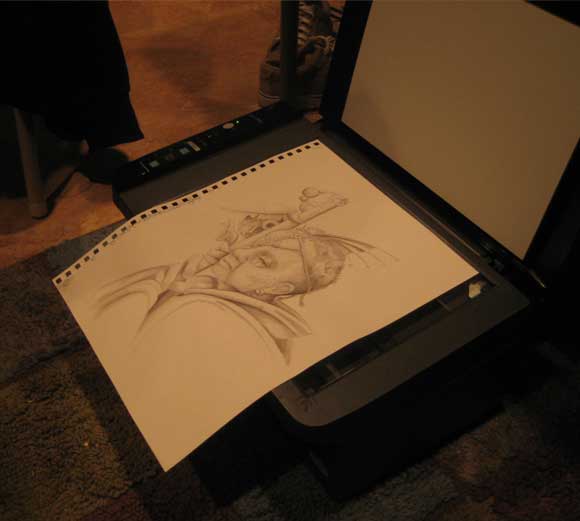
As you can see, my drawing is far too big for my scanner. Most scanners can scan a little bit more than and 8.5in/11in sheet of paper. But don’t fear, it will turn out alright. We will have to scan it in to different scans but we will have a complete picture in the end.
Step 3
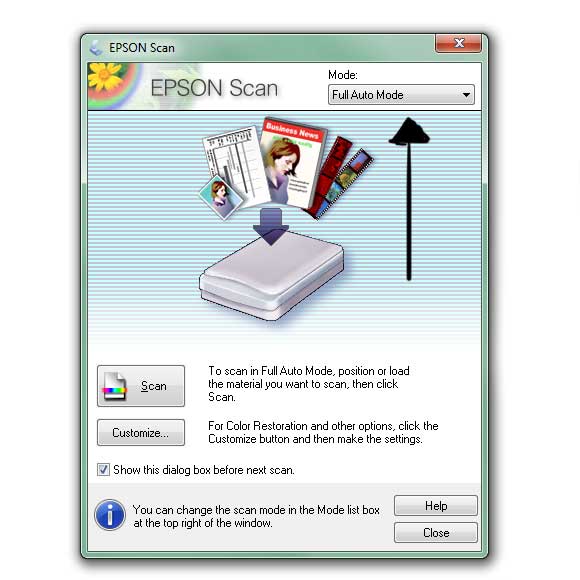
Boot up the software for the scanner. For this case the scanner I used is an Epson, but most scanners come with the same software functions. You will want to change the mode from “full auto mode” because it will make decisions for us that we don’t want. Go for the mode that has the most settings we can change.
Step 4
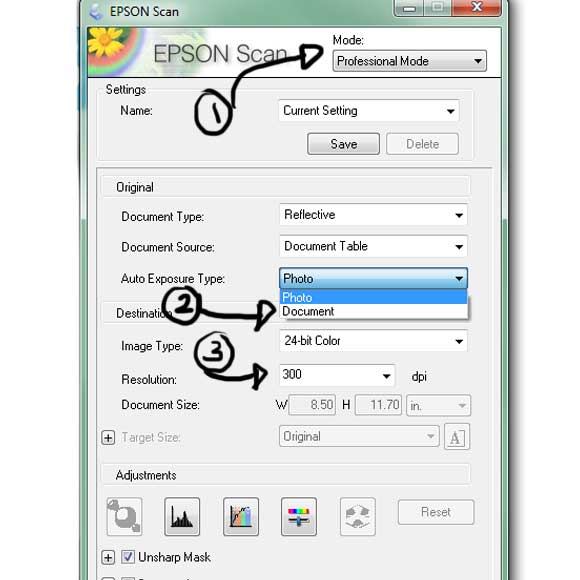
As seen (1) the setting I want is the “professional mode.” This will allow for greater customization to get the best scan. Then we will want to cahnge the exposure type (2) from a photo scan to a document. The photoscan will act as if it is scanning a photo but we aren’t doing that so we need it to be a document exposure. Then we will want to adjust the DPI resolution(3) “dpi” stands for “dots per inch” and this is important. The lower dpi means the lower quality your scan is going to be, but you don’t want the number to be too high either for it will make it too big of a file. 300 dpi is a good number for it is what most printers print at, but you can change it to meet what you want. Next we need to mess with some of the adjustments.
Step 5
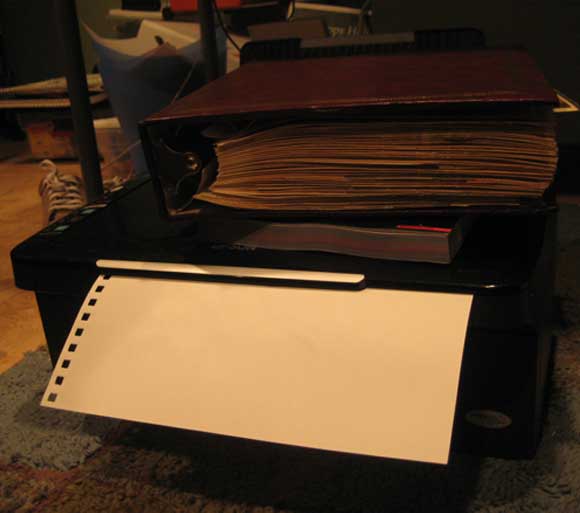
Okay, now put your picture in the scanner as straight as you can, and put some books on it as well to make sure that the edges stay down as well. For you if you forget to have it pressed there will be large shadows on the edges where your picture goes outside of the scanning area that will be hard to work with later.
Step 6
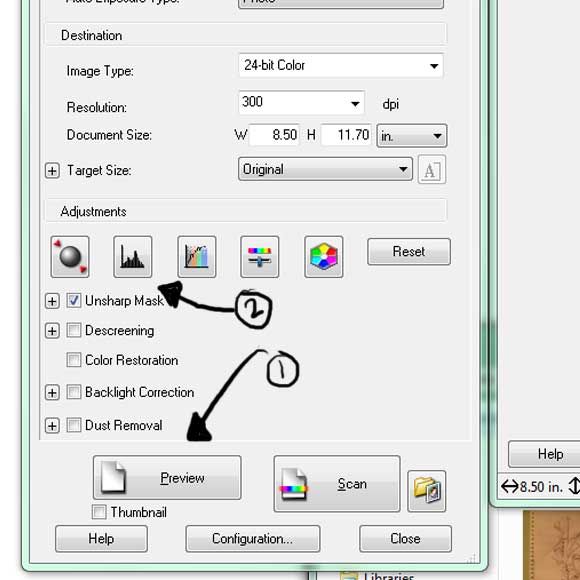
Alright you will want to hit the “preview” button (1) so you can see what it looks like. It will just make a quick scan for you to see and it won’t save it. To make the final scan you will want to hit “scan” but not yet . Then you will want to adjust the levels/histogram.
Step 7
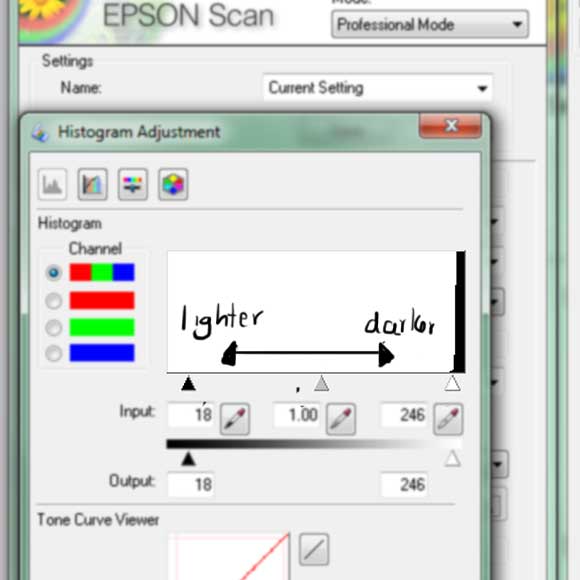
Depending on what you are wanting for your picture, you may want the scan to be lighter or darker than it actually is. That is where a levles/histogram adjusment helps. Those little triangles indicate the the brightness of the picture and you can slide them by just clicking and holding them. Move them to the right and the picture becomes darker, move them to the left and the picture becomes lighter. But remember, you don’t want the image to be too dark when you scan it because it will be harder to clean up. Then when you are ready you can close that window and scan the picture.
Step 8
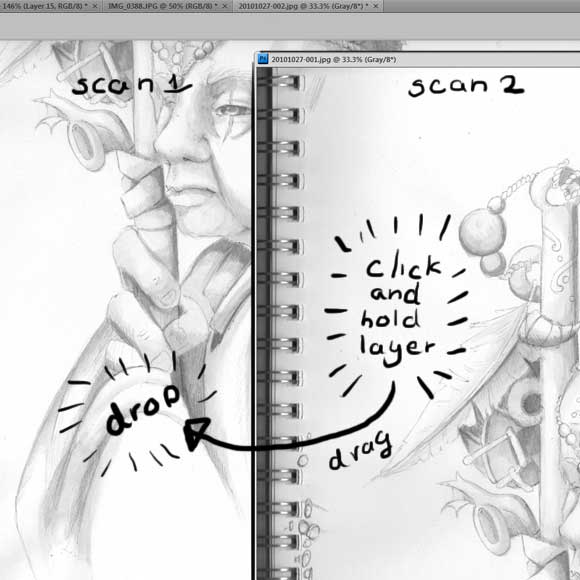
Remember we had to scan the drawing on 2 different scans. Now open both of them in photoshop and make sure you can see both together in some way. You may want to open a new photoshop document with the right size for the entire image. Then just click on the layers and drag them into the document.
Step 9
As you can see now that we have both scans in the same photoshop document we have some of the same image scaned twice. This is a very good thing. Now we can match the images up like a puzzel piece. Make sure that when you put them together to not have the image change in rotation or scale because it could make it difficult to match them up. If you do scale or rotate them make a note of the exact number you do it so you can accuratly do the same process to both.
Step 10
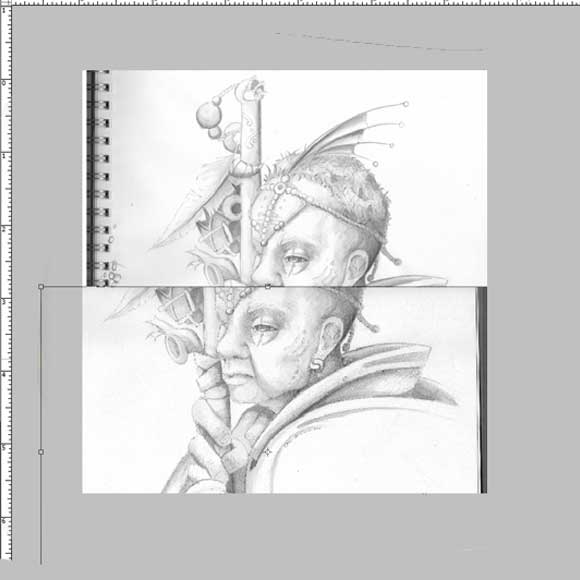
One way to help you match them up is having the scan that is on the top layer a litte bit more transparent. You can find this setting at the top of the “layers” tool box. This will help you match them up easier. You may have to rotate or scale one of the layers to make it match, but don’t worry you’ll get it with a little patients. If you can make it past this part its all easier afterwards.
Step 11
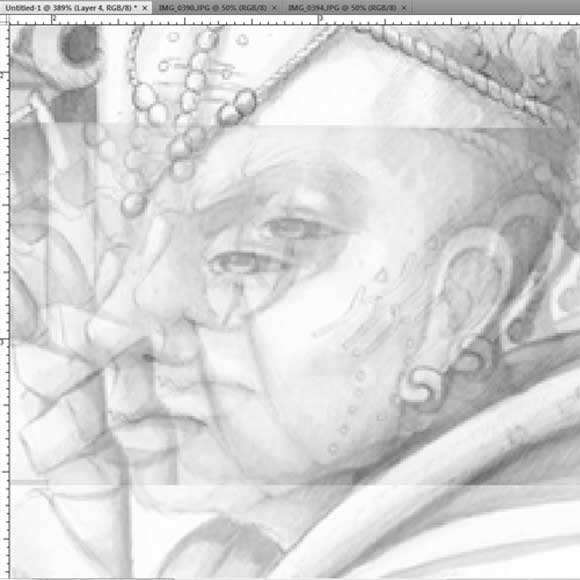
Now you can see that once we matched them up there are some lines of where the scans were. Don’t worry we can fix that! Because we have some of the image scanned twice we can fix the lines by erasing the edges of the scan without having to worry about loosing any of the image. Just do enough to were you don’t have any difference between the two images. If there is too much difference you may have to rescan them and try again. Practice makes perfect.
Step 12
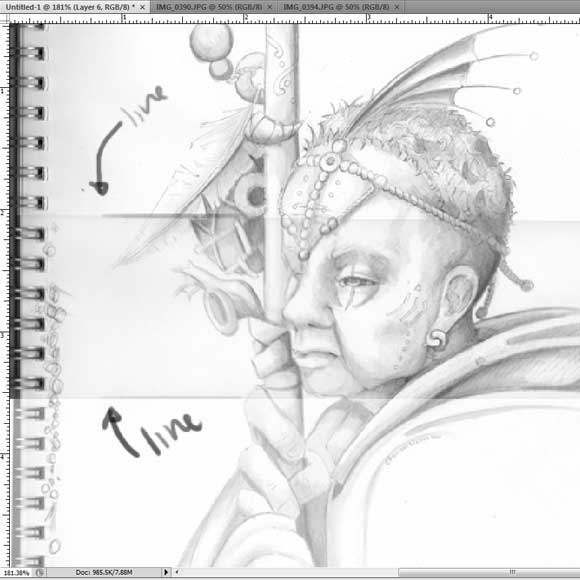
Alright, now that we have them matched and those scan lines gone we can merge the layers. “ctrl/cmd+E” is the shortcut while selecting the top layer it will merge to the bottom layer. But now the image is far too light we need to make the lines darker.
Step 13
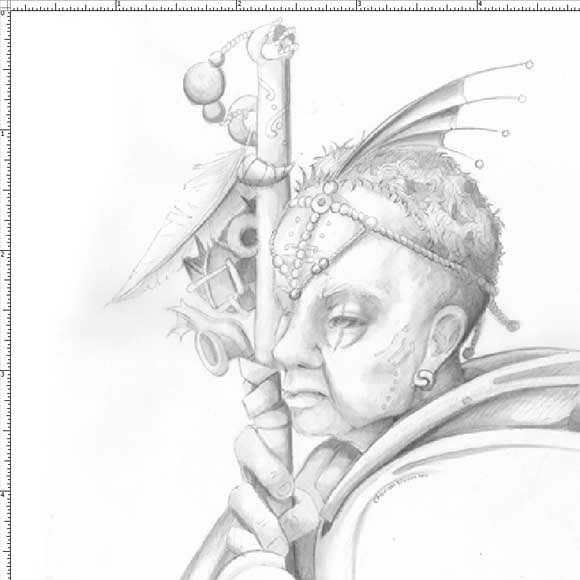
One way of doing it is by duplicating layer a few times with the shortcut “ctrl/cmd+J”. When you do this you need to have the copy’s layer style changed from “normal” to “multiply” which means that all the white will be completely transparent and all the drawing will only be slightly transparent, making the original drawing darker. You can see the layer styles at the top of the layer tool box in drop-town tab. You can do this multipul times to get the right strength you need.
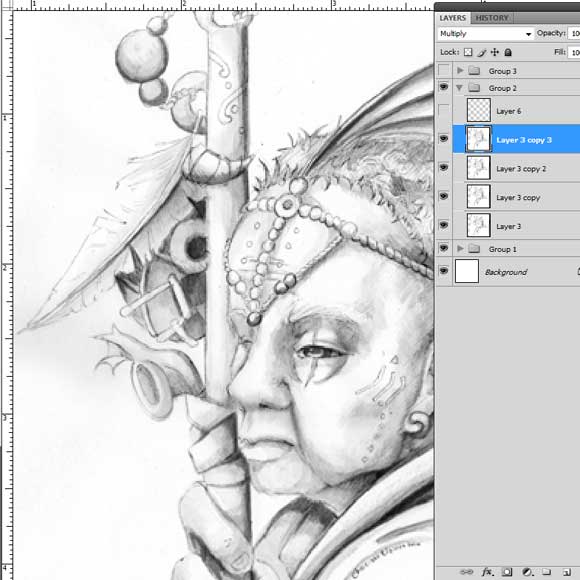
Step 14
After you received the right amount od strength you can merge the layers. But we aren’t finished yet.
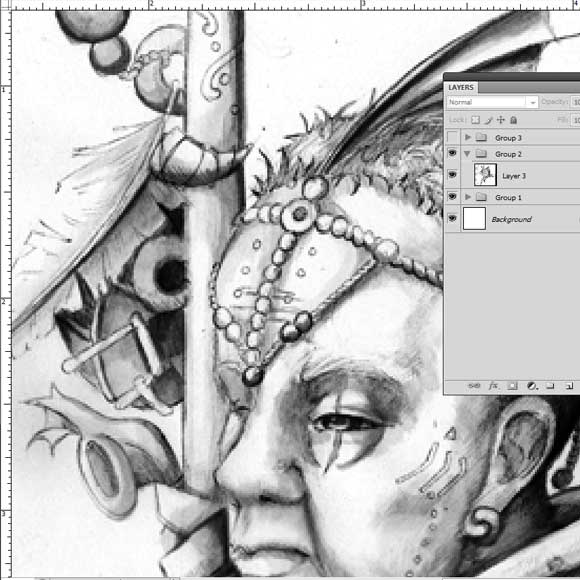
Step 15
Look at the circled areas, we have som artifacts [unwanted pixels leftover from scanning]. We will have to get rid of those.
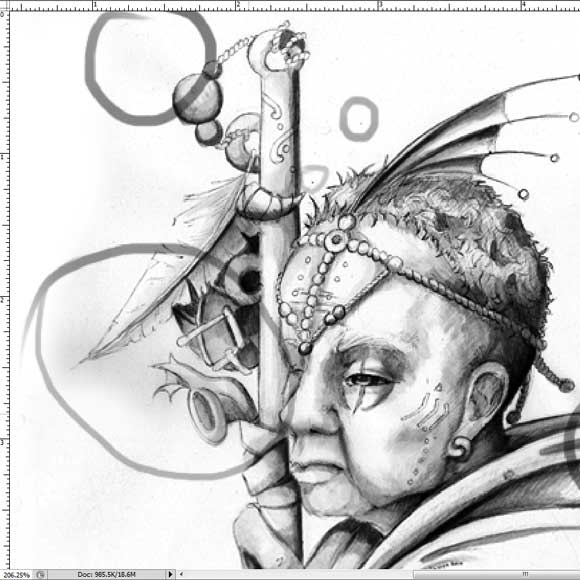
Step 16
Carefully use the eraser on those areas, don’t forget to adjust your size and edge hardness with right clicking.
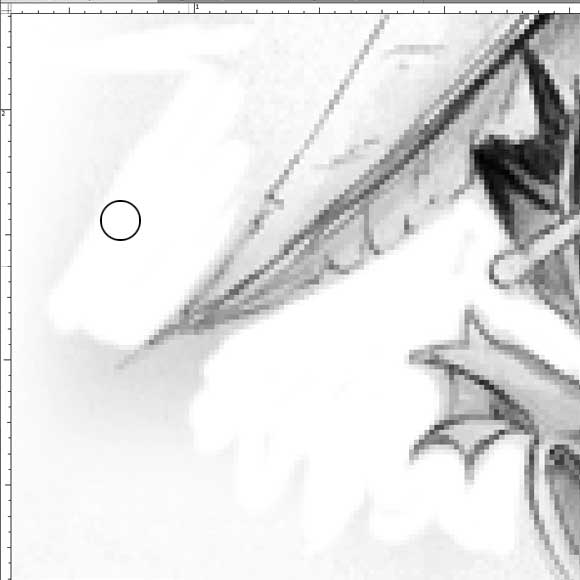
Step 17
Zoom out and look at your finished image! Enjoy! Hope you found this tutorial helpful!



Brilliant tutorial!
little bit complex, right? do you have tutorial for coloring scanned paper in photoshop? i want it looks very much like hand drawing works not photoshop works..
We got some useful tutorials in the future that I think it will create similar effect like you want to do but in Illustrator.
You can also use the PhotoMerge tool in Photoshop but remember to disable Cylindrical Mapping! It does a good job most of the time but when it doesn’t work, this tutorial is your next step.
Thanks Danny for sharing this useful information, have a great day 😉
Thank you so much!
I was modifying the channels to acquire darker lines. Now, I know a better way to darker lines, thanks!!