How to Create HTML5 Video for Your Website
10HTML5 marks the beginning of a new era in web development. The benefits of HTML5 are numerous, but one of its major highlights is its advanced multimedia support. With HTML5, video and audio files can be played in the highest quality, with faster load time and without any need for additional browser plugins, such as Flash, RealPlayer, Silverlight, etc. Plus, this web content will be viewed on any platform or device, as most of the widely used web browsers from all the top OS’s have support for HTML5.

If you are working on HTML5 based websites or just planning to upgrade your web-hosted multimedia to the latest standard, you may need a special tool to convert videos/animations into HTML5 supported formats – H.264, OGG Theora, WebM. With Freemake Video Converter, it is possible to create all those video variations in a bunch without having to follow any complex procedure. The main asset of this tool is that it generates the HTML5 code together with the resulted video and may show how this video will be streamed in different browsers. Follow the steps below to cope with the task of HTML5 video creation.
Step 1. Get started
Go to the Freemake website and download the video converter (version 3.0 or later). Once installed, open the application.

Step 2. Add video
You may input several videos coming from different sources. To add a desktop video, use “+Video” button or simply drag and drop files. To add a DVD, click “+DVD” and select the VIDEO_TS folder. If you want to turn web-hosted streaming video to HTML5 supported formats, copy the video URL and hit the “Paste URL” button.

Step 3. Edit video (optional)
For desktop videos you can optionally use the basic editor which lets you cut unnecessary parts, flip or rotate the video. Just double-click the video you’d like to edit, do the task you wish and click Ok to save the changes.

Step 4. Choose ”to HTML5”
Find the HTML5 button on the formats bar. If you’re going to use this output option on a regular basis, you may add it to the Favorites to make it sticky. Hit the button “to HTML5” and go to the conversion parameters.

Step 5. Hit a preset
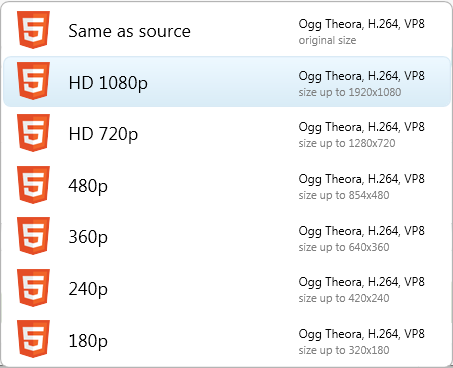
In the parameters window choose the preset – “Same as source”, “HD 1080p”, “HD 720p”, 480p, 360p, 240p, or 180p.

Tip: Usually web videos have 360p or 240p resolution. 360p is the default resolution – in the normal mode, it provides 1:1 relation between video pixels and screen pixels. It’s worth converting to higher video resolutions, if only your videos will be translated in full screen mode.
Step6. Convert video
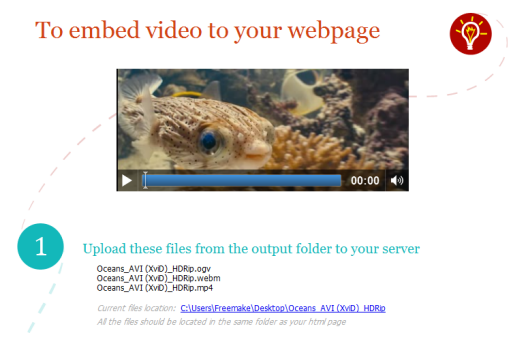
Click “Convert”. As a result, you get the folder containing three video files in H.264, OGG Theora, WebM formats and a web page with the code for web integraion.

Step 7. Upload video files to your server
You need to upload the video files to your server. All the files must be located in the same folder as the HTML page with the video.

Step 8. Paste code
Copy the code provided on the sample page and paste it into your HTML page, between the tags <body> and </body>.

Finally, I hope you enjoy this tutorial and find it useful.


Nice informative blog, thanks for sharing.
Thanks so much for sharing this!
” It’s worth converting to higher video resolutions, if only your videos will be translated in full screen mode.”
Am I missing something?
Is there a way to accomplish this task?
I do not see an cannot find a ‘maximize’ for these videos.
If there is no ‘maximize’ option, there’s no point in converting to this resolution that I see.
Please, if there is a way, point me in the right direction! 🙂
Nevermind:
I found this:
http://stackoverflow.com/questions/1055214/is-there-a-way-to-make-html5-video-fullscreen
thanks man great HTML5 Video Web site tutorial.
Thanks awesome information love this post.
The best tutorial on the web I have seen so far of html5 video handling
Most tutorials written by computer jerks
hii, i don’t know what is the process for the streaming i m writting this code but after compile the code will only buffer but not output the stream, so what is the process?
[…] out this Graphic Mania page for a short […]
Thanks so much for sharing this 🙂