How to Create a Tilt-shift Blur in Photoshop CS6
3One of the amazing new features in Adobe Photoshop CS6 is the Tilt-Shift Blur filter. Tilt-shift is a photography technique that creates a blur effect on images to give a miniature effect.It also adds a special depth of field effect to specific areas of the image.

The tilt-shift effect requires special lens to create both the tilt effect, where the lens rotates in relative to the scene, and the shift effect where the camera lens moves parallel to the scene’s plane. Since this effect requires a specific lens and techniques, it was not commonly used by photographers. Now, with the new Tilt-Shift Blur filter in Photoshop CS6, designers and photographers can apply a tilt-shift blur effect on photographs that are taken with ordinary camera lens or even small point-and-shot digital cameras.
Related posts:
- Quick Tip: How to Create a Seamless Pattern in Photoshop
- How to Create Islamic Style Poster in Photoshop
- How to Customize Skyscraper Background in Photoshop
- How to Create a Photo Manipulation Poster in Photoshop
- Amazing Photo Manipulation Tutorials
- How to Create a Comic-Book Style Image of Yourself
- How to Create HDR Photos in Photoshop CS5
In this small tutorial, we will learn how to create a tilt-shift effect on a photograph using the Tilt-Shift Blur in Photoshop CS6. Note: You can download the beta version of Adobe Photoshop CS6 from Adobe Labs.
Image before the tilt-shift blur effect

Image after applying the tilt-shift blur effect
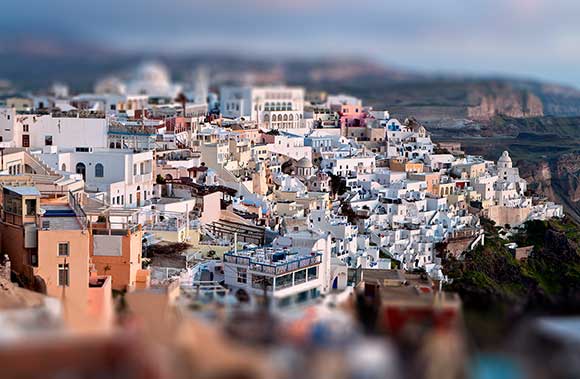
Now, let us see how to create this effect through the steps below:
Step1:
Open the Landscape image below in Adobe Photoshop CS6. I tried to choose a photo of a landscape with buildings in order to show a clear result from applying the effect on it. You can choose any image you would like in this example.
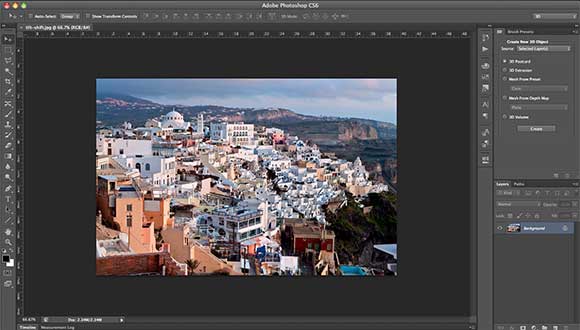
Step2:
From the Filter menu, choose Blur>Tilt-Shift Blur, this will open the filter dialog box. This dialog box corresponds with three filters; click the arrow next to the Tilt-Shift to expand it.
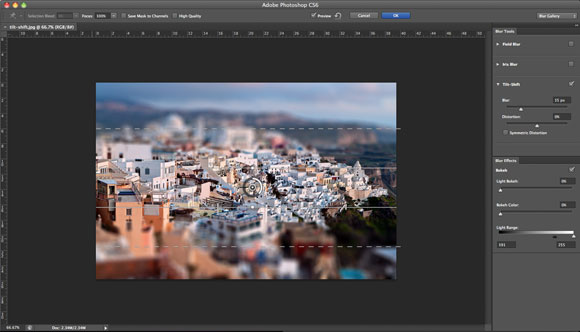
Step3:
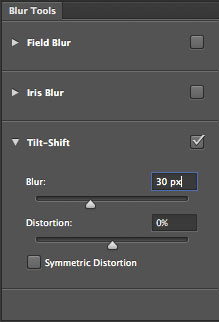
Set the Blur value to 30 px. This value sets the amount of blur applied outside the focus area of the lens.
Step4:
Set the Distortion to 0%, this value distorts the blurred area.
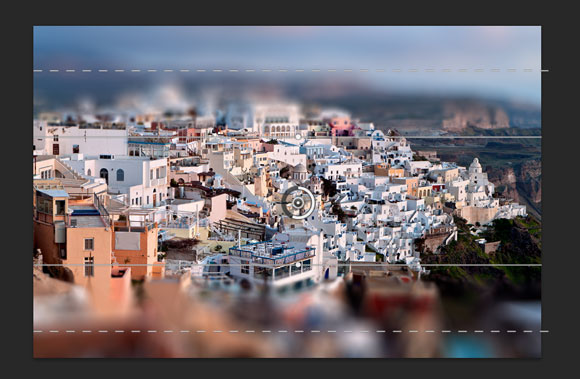
In the Preview area, you can see the lens focus applied to center of the image by default. Also, you can click to create more lens focus. The lens focus includes the following:
- The lens focus center is the center point of the effect and you can click on the focus circle and drag to increase or decrease the lens blur value.
- Click the center of the focus point and drag to move the center point of the effect.
- Next to the center point, the solid lines represent the clear area or the borders of the focus area, where the image looks clear without any blurs applied to it.
- In the bottom solid line under the filter focus center, there is a small circle that allows you to rotate the filter effect.
- The dashed lines represent the borders of the blurred area. So, the blurred area is limited within the solid and the dashed lines.
Step5:
Now, move the solid lines to reveal the clearer buildings in the image.
Step6:
Move the dashed lines to the top and bottom edges of the image. Click OK to apply the filter effect.
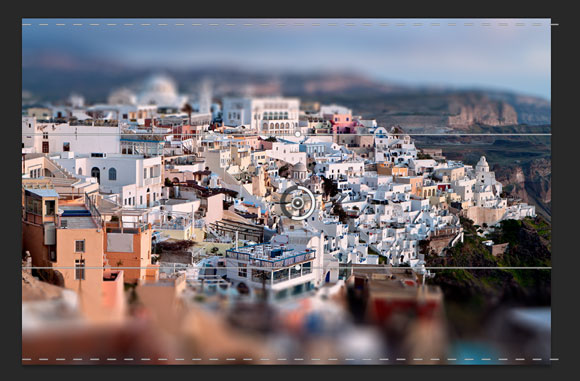
The final image should look like below:

As you can see from the steps above, you can create the tilt-shift effect easily without having to use special lens. You can start by creating your own tilt-shift effects and explore how the different options affect the final result of the image. Share with us links to the images you create using this effect, and feel free to add any questions in the comments section.


Good tutorial, thank u!
i don’t really see the diff from adding a “gradient blur” like before..
The filter tries to mimic the real tilt-shift photography. How did you use to do this effect before?